Your cart is empty.

Your cart is empty.

Clear the flooded ruins beneath Zoram Strand without assembling a level-appropriate party or learning every swim tunnel yourself. One ordered run follows the complete route to Aku'mai, covers the eight listed boss encounters, and progresses every eligible dungeon or class objective already available to your character.
The referenced configuration highlights Piloted + Loot Priority. Eligible tradable gear for the specialization confirmed with the order receives priority, while every boss drop still follows the live game's random loot table.
Both options use the same full temple route. The difference is how eligible items are distributed after they drop.
The group clears the underwater tunnels, murloc caverns, Twilight Hammer rooms, candle event, and the final chamber.
The route covers Ghamoo-ra through Aku'mai, including optional encounters when their summon or spawn conditions are available.
Eligible faction, class, and dungeon objectives already accepted on the character are progressed during the run.
Eligible equipment, recipes, materials, and ordinary drops follow the loot rule selected for the order.
Eligible combat XP, quest XP, gold, reputation, and pickups earned during the purchased run stay on the character.
The purchased run count, final-boss kill, completed objectives, and received rewards are checked before notification.
Travel from Auberdine in Darkshore and move south into northern Ashenvale. The dungeon portal lies below the ruins on the Zoram Strand coast.
Use the Zoram Strand flight path when unlocked, then travel along the coast to the submerged temple entrance beneath the ruins.
Objectives are completed only when the character matches the required faction, class, level, prerequisite chain, and accepted-quest state. Prepare applicable quests before the run whenever possible.
ALLIANCE
Recover the required manuscript after accepting the Ironforge quest from Gerrig Bonegrip.
ALLIANCE
Collect the eligible corrupted materials for the Auberdine quest while clearing the temple.
ALLIANCE
Collect Twilight Pendants from eligible enemies after taking the quest in Darnassus.
ALLIANCE QUEST CHAIN
Find Argent Guard Thaelrid inside the dungeon and continue into the final-boss objective.
BOTH FACTIONS
Defeat Twilight Lord Kelris and secure the required quest item when the objective is active.
HORDE
Collect the required sapphires from the dungeon after accepting the Zoram'gar objective.
HORDE
Progress the Damp Note chain and defeat the eligible Naga target when the quest is prepared.
HORDE QUEST CHAIN
Recover the Fathom Core, summon Baron Aquanis, and progress the follow-up when requirements are met.
WARLOCK · BOTH FACTIONS
Collect the eligible Soran'ruk fragment from Twilight enemies for the Warlock class quest.
PALADIN CLASS OBJECTIVES
Progress The Test of Righteousness for Alliance Paladins or A Moon-Kissed Blade for Horde Paladins when eligible.
The optimized route follows the eight encounters listed on the reference service, with optional and summoned bosses clearly identified.
01
The heavily armored turtle boss encountered beyond the opening flooded passages.
02
A Naga boss reached through the north-western swim tunnel and its guarded cavern.
03 · OPTIONAL
The optional murloc boss whose chamber is cleared before progressing deeper into the ruins.
04 · CONDITIONAL SPAWN
An optional encounter that can appear at different points after the murloc section.
05 · SUMMONED
An optional boss summoned from the Fathom Stone when the applicable interaction is available.
06 · OPTIONAL
An underwater optional boss found in a side chamber beyond the lower ruins.
07
The temple guardian defeated before the four-brazier event opens the final route.
08 · FINAL
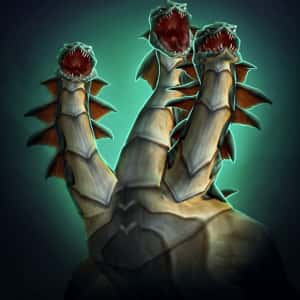
The final hydra boss in the sealed chamber and the completion target for the full run.
These named items illustrate the dungeon's loot pool. Every item remains subject to the correct boss being available, random drop results, and the loot option selected for the order.
Source: Ghamoo-ra
Type: Mail chest armor
Source: Ghamoo-ra
Type: Stamina ring
Source: Lady Sarevess
Type: One-hand sword
Source: Gelihast
Type: Effect trinket
Source: Twilight Lord Kelris
Type: Spellpower staff
Source: Aku'mai
Type: Two-hand sword
Confirm region, quantity, service method, loot option, character class, and specialization.
Repair gear, clear bag space, and accept every eligible faction or class quest before the start.
The team completes the swim route, optional encounters, candle event, and Aku'mai kill.
Review completed objectives, received loot, experience, and the purchased number of finished runs.
Character: Eligible for the selected WoW Forever region and dungeon entry.
Quests: Accepted with all required prerequisite steps already finished.
Inventory: Enough free bag slots for quest items and dungeon drops.
Loot Priority: Class, specialization, and desired gear category confirmed before the run.
Unselected extras: Additional runs, Self-play, express completion, or streaming.
Unprepared quests: Missing, unavailable, wrong-faction, wrong-class, or incomplete chains.
Guaranteed named loot: Specific boss drops, recipes, and complete sets remain random.
Unreachable encounters: A conditional spawn or summon that cannot be activated for the character.
One complete route through the temple, the purchased boss route, accessible optional encounters, Aku'mai, and eligible prepared quest objectives.
Current WoW Forever guides list the dungeon for approximately levels 24–32. Actual entry and service eligibility should be confirmed for the character before ordering.
The route targets all eight encounters. Gelihast, Lorgus Jett, Baron Aquanis, and Old Serra'kis are optional or conditional encounters, so required spawn, summon, faction, or interaction conditions still apply.
Group Loot uses normal party rolls. Loot Priority gives the character priority on eligible tradable items suited to the specialization confirmed in the order.
No. Loot Priority can change who receives an eligible item after it drops, but it cannot force Strike of the Hydra or any other named item to appear.
Only eligible quests already available to the character can be progressed. Faction, class, level, prerequisite, pickup, and turn-in requirements still apply.
The route includes Baron Aquanis when the Fathom Stone interaction and relevant character or quest conditions allow the boss to be summoned.
The entrance is beneath the ruins on the Zoram Strand coast in north-western Ashenvale.
Yes. The event after Twilight Lord Kelris opens the route to Aku'mai and is part of a complete clear.
Yes, when additional quantity is available. Each purchased run creates another independent set of boss kills and random loot opportunities.
Repair equipment, leave free bag slots, accept eligible quests, confirm the region, and provide the requested character and specialization details through the order process.
Eligible gold, materials, ordinary drops, quest rewards, and equipment received under the selected loot rules remain on the character.
Choose the correct region, run quantity, completion method, and loot option. Prepare every eligible quest first, then complete the submerged temple through Aku'mai with the conditions clearly defined before the run begins.