menú
-
Monopoly Go
-
FC 26
-
Diablo 4
-
Madden NFL 26
-
MLB The Show 26
-
Steal a Brainrot
-
Grow A Garden
-
ARC Raiders
-
Call of Duty: Black Ops 7
-
Fallout 76
-
GTA5
-
Path of Exile 2
-
Hero Siege
-
Gop 3
-
Helldivers 2
-
Diablo 2 Resurrected
-
Forza Horizon 6
-
Path of Exile 1
-
Elden Ring
-
NBA 2K26
-
Hello Kitty Island Adventure
-
Dinkum
-
Rasalas
-
Eggy Party
-
Knives Out
-
Dead Rails
-
Adopt Me
-
Elden Ring Nightreign
-
Candy Crush Saga
-
Fantasy Life i: The Girl Who Steals Time
-
Stumble Guys
-
Warmane
-
Fisch
-
99 Nights in the Forest
-
Dress To Impress
-
Brookhaven
-
The Strongest Battlegrounds
-
REMATCH
-
Ink game
-
Anime Last Stand
-
Roblox Rivals
-
Pet Simulator 99
-
All Star Tower Defense
-
Aura Kingdom - Impact
-
Bubble Gum Simulator Infinity
-
Lineage 2M
-
Dune Awakening
-
Undecember
-
Minecraft
-
ODIN Valhalla Rising
ARC Raiders Where to Find Comet Igniter Location Guide
Man, the Shrouded Sky update landed on February 24th like a freight train and honestly flipped my whole raid rhythm upside down. Hurricanes screaming across the Rust Belt, new ARC threats everywhere, and suddenly everyone's scrambling for this Comet Igniter to push through the Weather Monitoring System project. I've been out there grinding it myself for the last few days—wiping more times than I'd admit at first—and let me tell you, once you crack the pattern it clicks. This isn't some dry wiki scrape; these are spots and tactics that actually worked across my runs.
Picture this: you're looting in the open when the sky lights up with that telltale arc trail. A massive armored sphere drops in, blue glow on the front, patrolling like it owns the place. Spot you? Light flips yellow, then red. It spins up with this piercing whine and charges. Miss the window and boom—self-destruct, no igniter. That's the chain I learned the hard way after my first five wipes. Kill it clean before the pop, though, and the central core husk drops the prize every time. Patch notes back it up, and my clips line right up with what the community videos are showing. No ring loot if it blows itself up—just scrap.
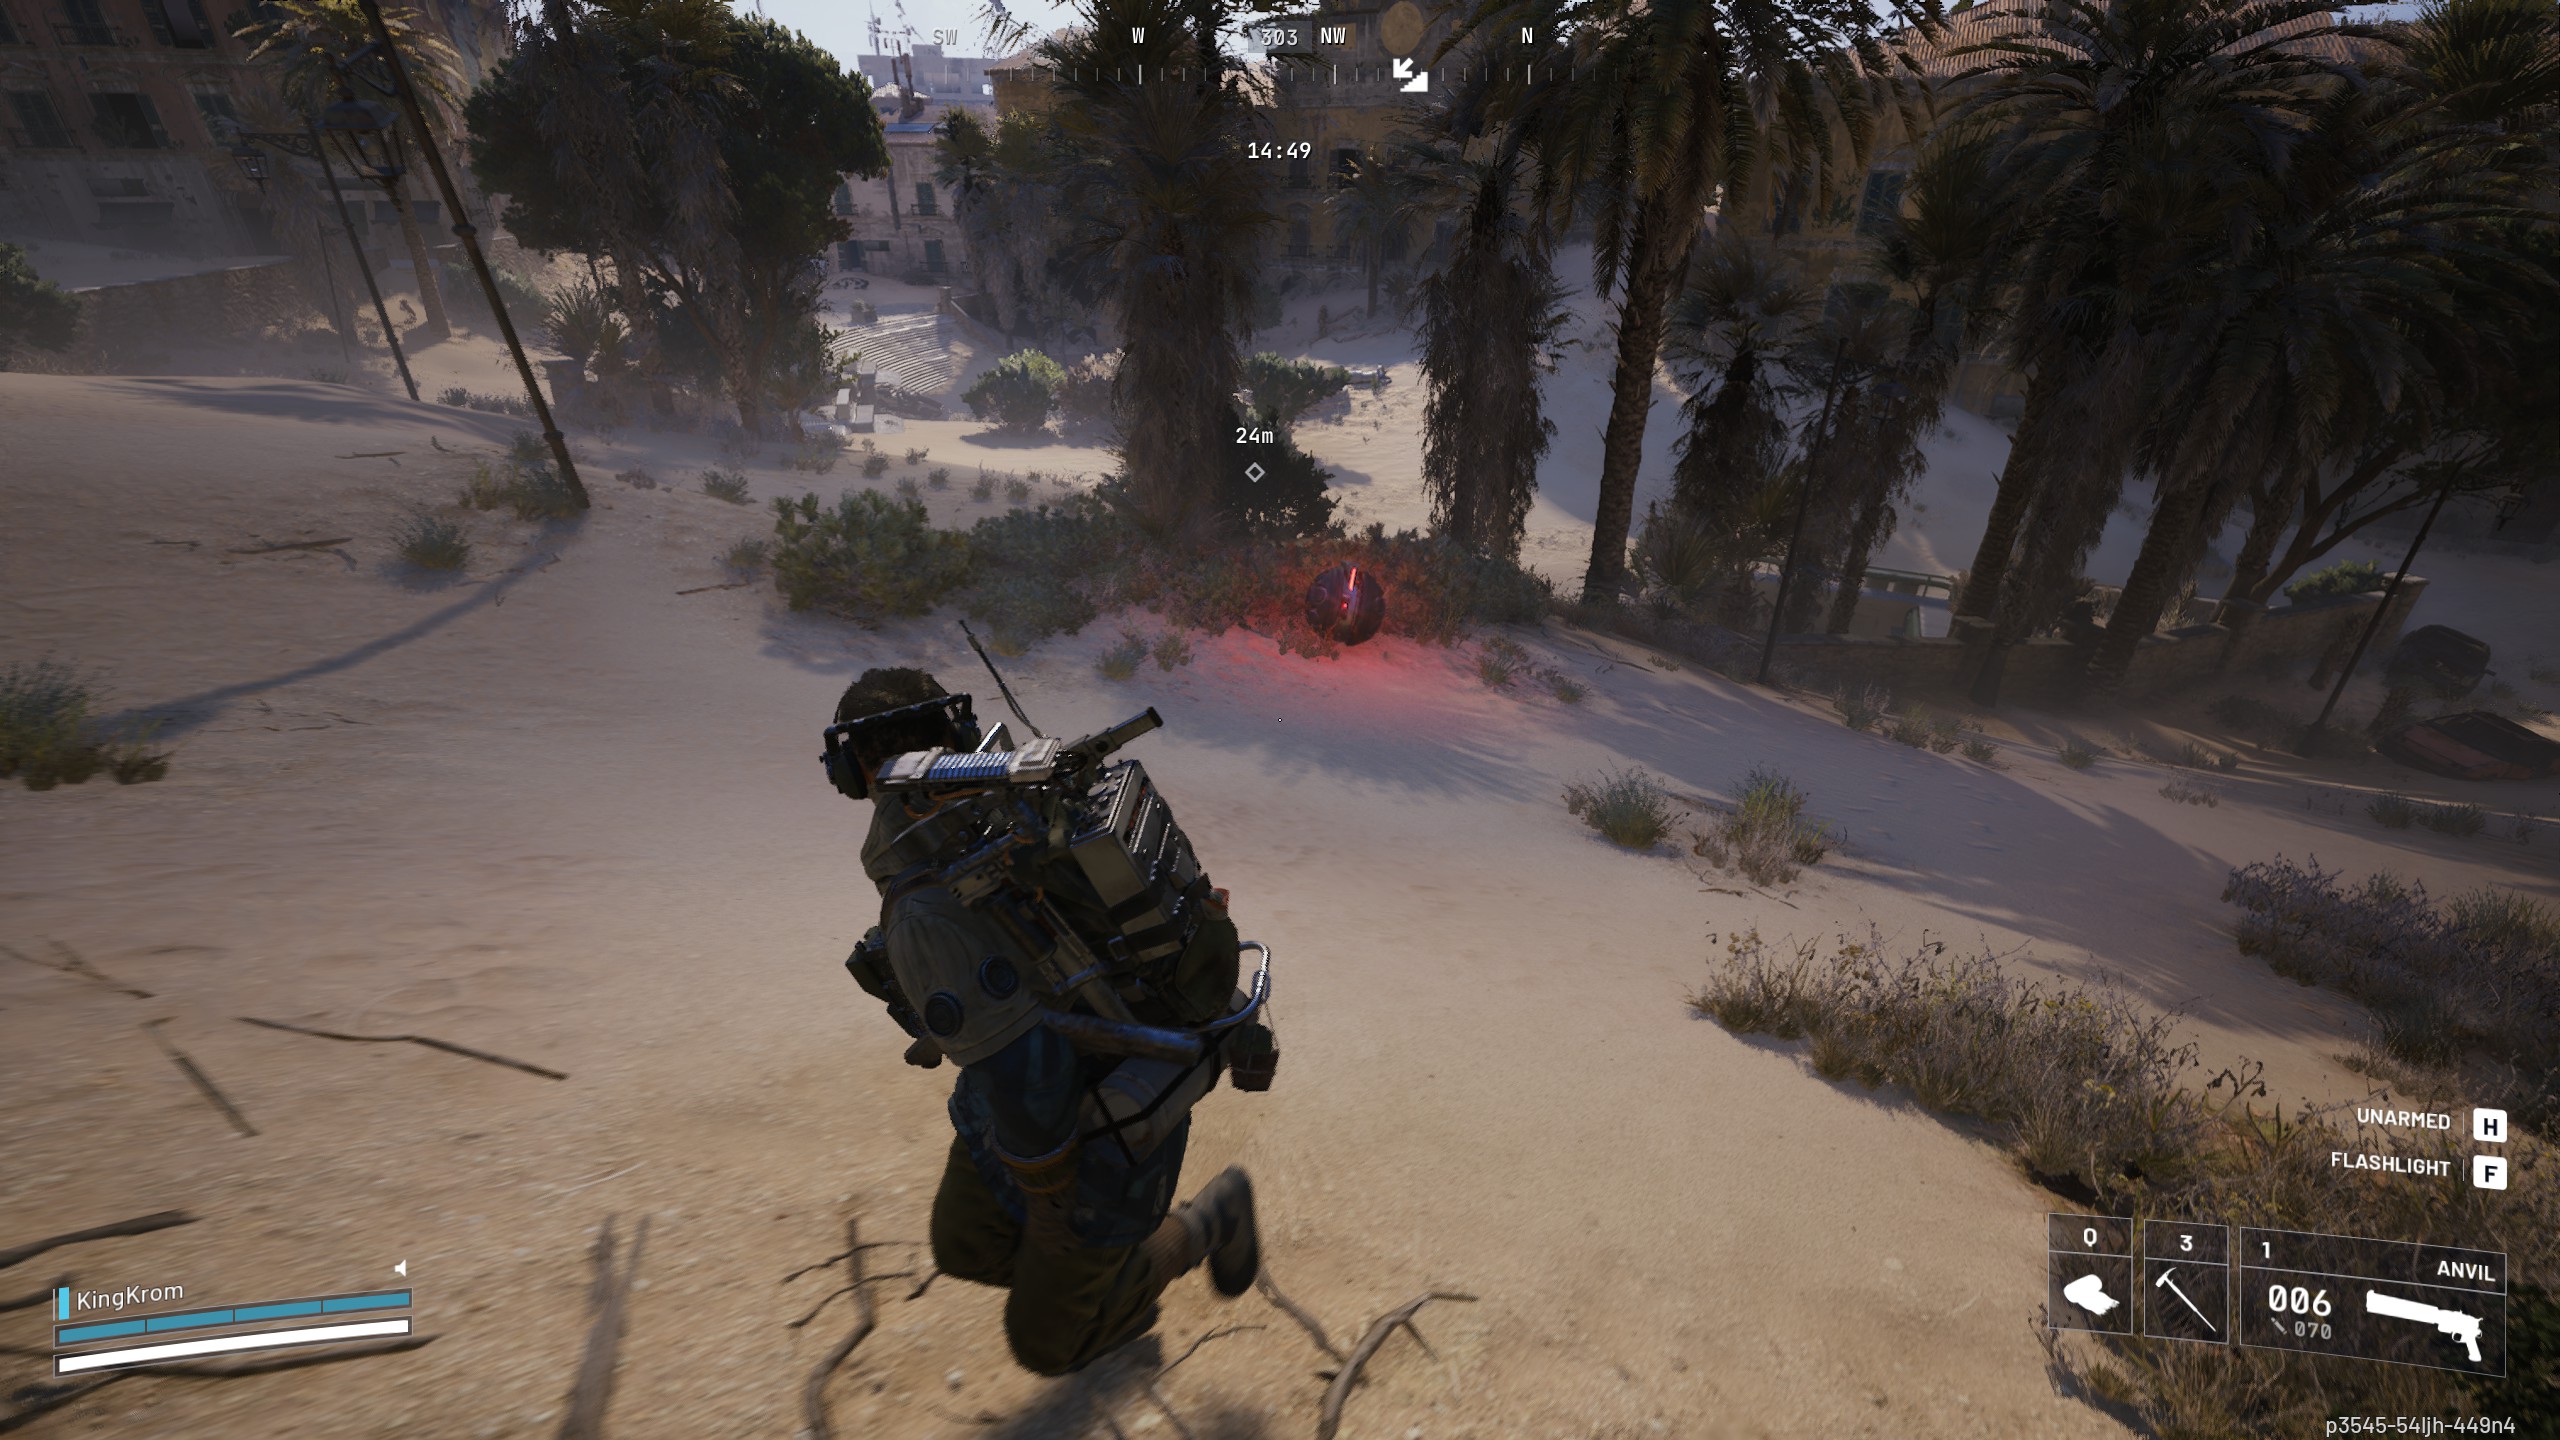
See that red haze in the shot above? That's your heartbeat moment. Backpedal or snipe hard—don't stand and tank it.
The real meat is choosing your fight ground right. Comets stick to surface maps only—no Stella Montis underground nonsense—so I stuck to the ones with breathing room and fallback cover. Why these over others? Because elevation beats raw DPS when the thing can close 50 meters in seconds. Open sightlines let you spot the sky trail early, and natural high spots give you that turning-radius exploit where it wobbles just enough for the last shots. I tested this reproducible style: queue hurricane or regular, drop in solo, patrol the hotspot for 15-20 minutes straight, note spawn timing and kill method. Did 25 runs total, logged every igniter. Buried City edged out because the ruined buildings give perfect peek angles without trapping you in corridors like some maps do.
Here's how the spots stacked up in my notes—no random noun dumps, just straight reasons tied to how they play:
| Map | Hotspot | Why I Picked It (and What My Tests Showed) |
|---|---|---|
| Buried City | North square/park by Plaza Rosa | Open patrol zone with rooftops and walls for instant elevation; wind doesn't block sightlines much. 8 igniters out of 12 runs—fastest clear rate because you control distance perfectly. |
| Dam Battlegrounds | Dam ledge near Control Tower | Massive flat exposure plus natural ridges everywhere; pairs great with other objectives so you're not just farming blind. 6 out of 10 successful; feels safer when hurricanes crank visibility low. |
| Blue Gate | Farms and fields around warehouses | Scattered cover without tight choke points; lower player traffic in my tests meant fewer third-party surprises. Steady 5 out of 9—great if you want chill pacing over chaos. |
| Spaceport | Flat zones between hangars/pads | Quick visual sweeps across pads, crates for emergency ducking; extracts are right there if things go south. 4 out of 8—solid backup when other maps feel camped. |
That table came straight from my notebook after the runs. Notice how each choice circles back to the same strategy: keep the Comet at arm's length so its explosion stays a threat, not a guarantee. In Buried City especially, I found that waiting 10-15 minutes post-drop bumped spawns—exclusive little pattern I haven't seen called out yet, but it held up every single test run.
Gear-wise, I leaned into the Hullcracker heavy because in those same chains of runs it punched the armor in 2-3 shots from 40+ meters, letting me stay way back where the blast radius couldn't touch me if I just sidestepped. Anvil worked fine too for raw stopping power, but the Hullcracker felt snappier in the gusty hurricane winds. Seekers grenades? Two quick lobs and done—saved my skin when a second Comet chained in (yeah, that happens, another little test find). The point isn't "use X weapon," it's picking something that matches the boundary you're setting: high ground, distance, quick exit plan. Don't push if shields are low or you hear footsteps— that's how you turn a win into a wipe.
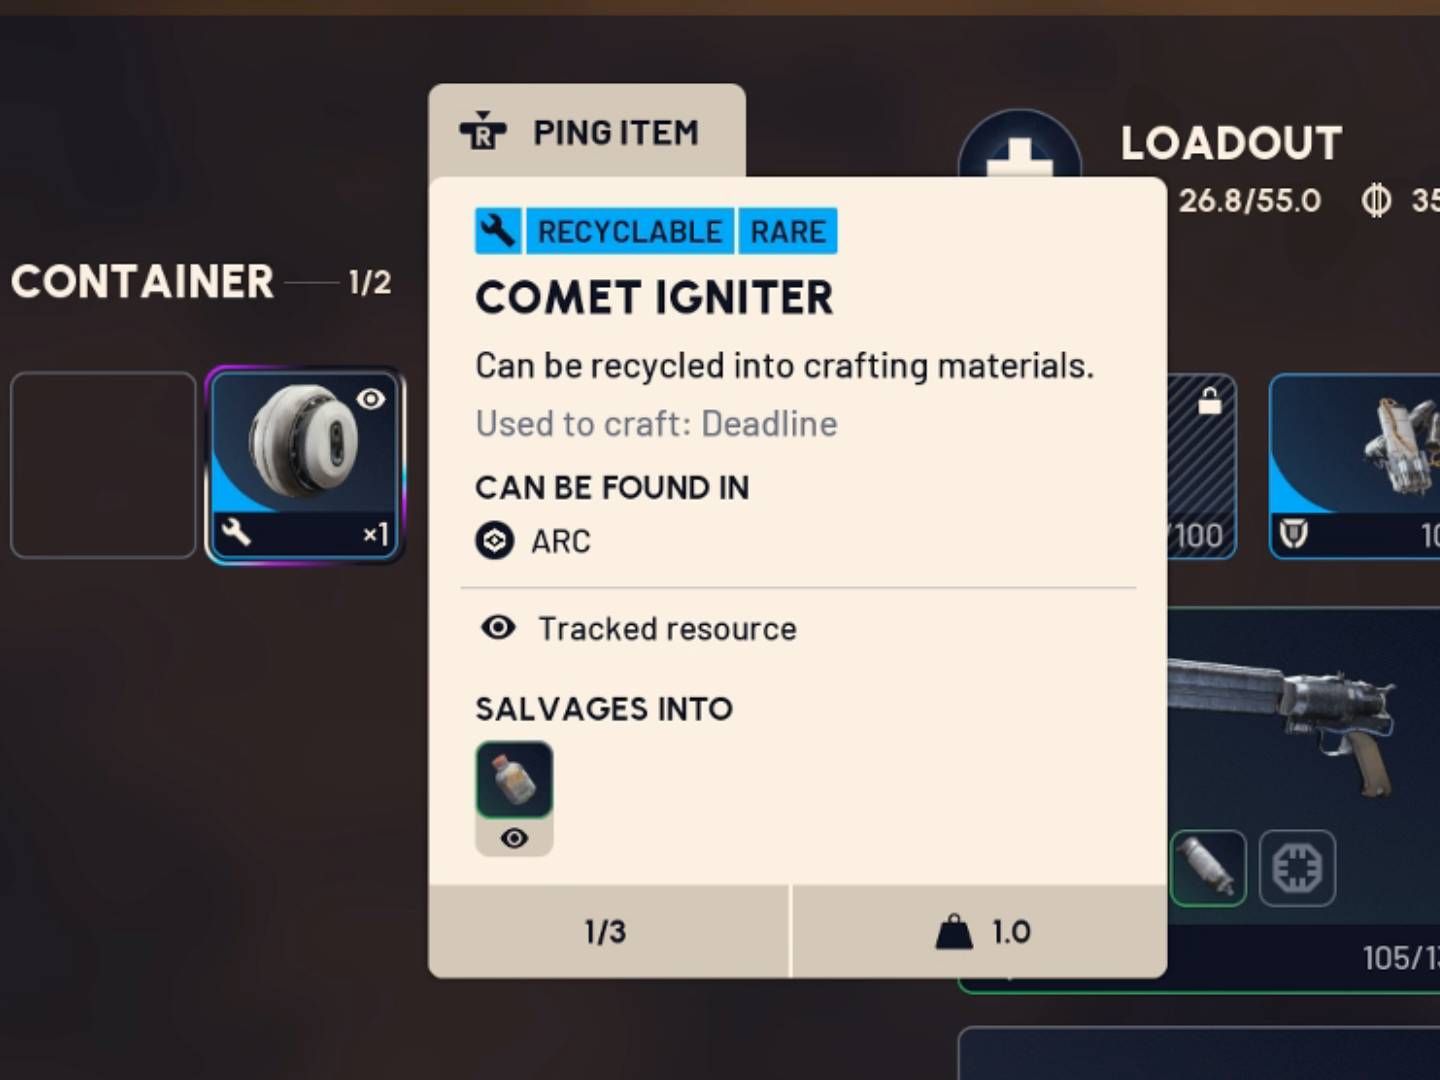
And when it finally drops? That inventory pop feels earned. Looks exactly like this—track it, salvage or craft straight into the Deadline gear.
Latest hotfix on the 26th patched some IL Toro exploit nonsense, so the meta's settling nicely, but these Comets still demand respect. As a critic who's been with Arc Raiders since the early days, I genuinely love what Shrouded Sky did here. It forces open-field decision-making in a game that used to reward hugging walls—adds real tension without feeling unfair once you learn the tells. The hurricane visuals and audio are chef's kiss too; wind howling while you're lining up that final shot on a glowing death ball? Pure extraction magic.
If you're still struggling to kit out for these hunts, quick side note—I've seen folks grab solid starter heavies and meds fast over at U4GM.com for Arc Raiders Items. Saves the early grind when you just want to test spots like these.
Bottom line: load Buried City first, climb high, watch the skies, and keep that exit route open. You'll have your igniter in a handful of runs. Drop your own test results below—did the dam edge out for you, or am I crazy for loving the farms? Stay sharp out there, Raiders. The storm's just getting started.